Omega Awning Spring Installation

Omega Brown Aluminium Canopy Being Used As An Attractive Carport With Sun Shade Bronze Roofing Carport Canopy Christmas Village Houses Carport

Optional Knee Braces To Give The Canopy A More Traditional Feel With Images Outdoor Living
Omega Ii Owners Manual Carefree Of Colorado

Carefree Of Colorado Omega Slide Topper Replacement Youtube

Omega Smart Lean To Canopy Anthracite Grey 16mm Polycarbonate Glazing 2 1m W X 1 5m P 2 Supporting Posts Canopy Lean To Polycarbonate Roof Panels

Carefree Of Colorado Vinyl Omega Awnings Tough Top Awnings

Omega 1 and omega 2 with valance and omega 2 without valance.
Omega awning spring installation.

Window Awning Copper Awning Metal Awning Window Remodel

Store Front With Awnings Metal Awning Metal Awnings For Windows Commercial Building Plans

Amazon Com Carefree R00731 Left Spring Assembly For Omega Ii Automotive

Pin On Metal Roofs

How To Replace Incandescent And Halogen Bulbs With Leds In Your Rv Rv Led Lights Rv Stuff Rv Lighting

Zip Dee Awning Door Roller How To Build A Small Roof Over Doorway Wood Plans Front Overhang Styles Called S Door Awnings Front Door Awning Steel Doors Exterior

Pin On Awning Canopy Recovers Repairs

Amazon Com Carefree R00590 Right Spring Only For Omega Ii Automotive

Rv Roof Repair Multilayer Peel And Stick Membrane 38 8920 Rv Roof Repair Roof Repair Roofing

Overstock Com Online Shopping Bedding Furniture Electronics Jewelry Clothing More Door Awnings Aluminum Awnings Home

Pin On Automotive Exterior

Metal Awnings Google Search House Awnings Porch Awning Mobile Home Porch

Diy Slide Stabilizers Diy Slides Diy Rv Rv Stuff
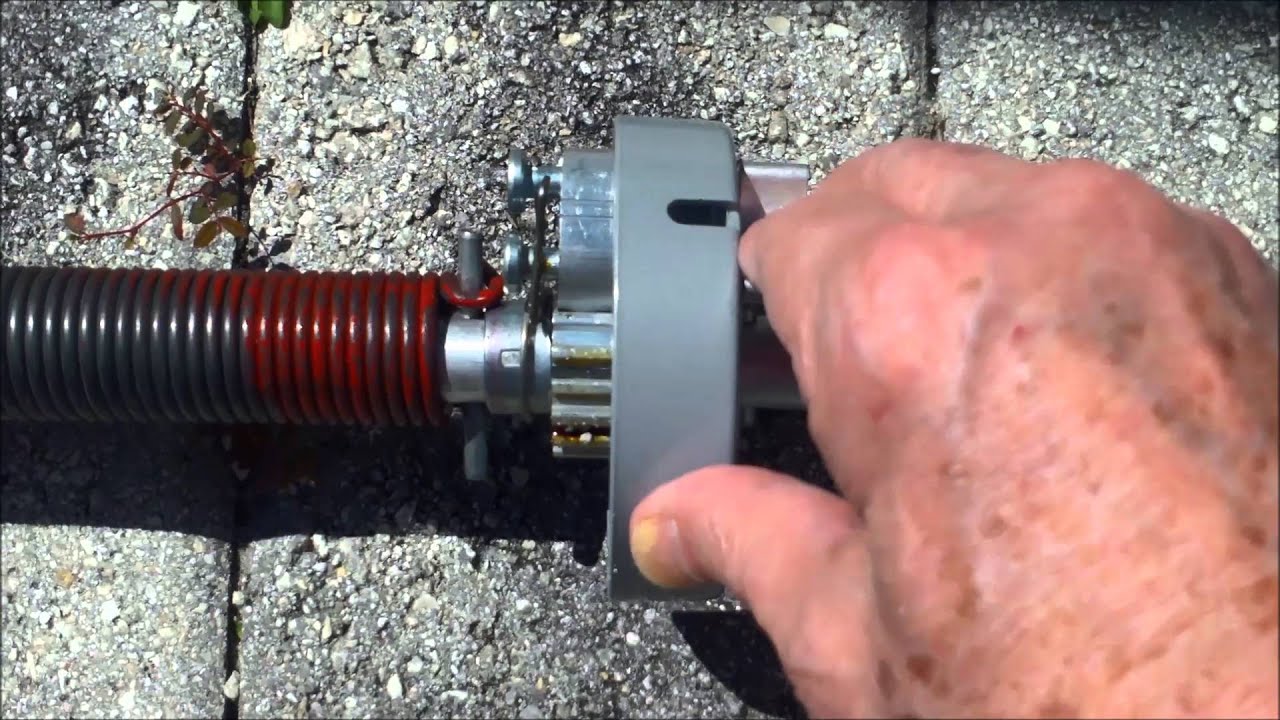
Awning Spring Assembly Youtube

Electronics Cars Fashion Collectibles Coupons And More Ebay Moon Candle Metal Mesh Hanging Lanterns

Rv Awning Repair Re Tensioning The Spring Doityourself Com

2016 Side Patio Awning Closed Remodeled Campers Camper Living Luxury Fifth Wheel

Omega Omega Pacific D Locking Carabiners 6 Pack Spring 2010 Carabiner Climbing Carabiner Arborist
Https Encrypted Tbn0 Gstatic Com Images Q Tbn 3aand9gcruy53z947s9uhn3zsa6fx Zqehzpknmspjxcwyj8whiw0tgy7e Usqp Cau

20 Marvelous Door Overhang Design For Home Outdoor Decoration Timber Frame Porch House Exterior Porch Timber

Mechanics Rolling Toolbox Creeper Work Stool Garage Seat Black Shop Tool Storage Tool Box Mechanic Tool Box Fastening Tools

Godt Grunnarbeid Og Fundament Er Alfa Og Omega For Drivhuset Skarpihagen Havearbejde Drivhus

Details About Vintage Longines Around 1980 With Open Guarantee Kannon Opening Empty Box In 2020 Longines Burberry Mens Watches Ebay

World S Best Cooking Experience Sierra West Sales Kitchen And Bath Remodeling Kitchen And Bath Bath Remodel
Source : pinterest.com
